
Easy peasy pom-poms!
The Easter holidays are here, and the ever-changing weather keeps us on our toes. As Autumn settles in it’s a nice time to stock up on some simple craft supplies to keep little fingers busy indoors and out. Textile crafts come to mind as the days become cooler – do you have a wool stash? Admittedly mine is ridiculous, but it’s always good to have a few balls of yarn around for creating with the kids.
A great place to pick up very cheap wool is an op shop. Knitters often donate balls or parts of balls that are leftover from their projects, and you can find all sorts of bits and pieces of lovely yarns that are sold very cheaply. Sometimes you will need to ask op shop staff where to find their stash, as its often tucked away in a basket or drawer.
A few years ago we spent 13 weeks together on a family camping trip through central Australia, and as we visited towns I'd nip into op shops and rummage through their wool stashes. I collected all sorts, sticking to yarns of medium thickness in shades of blue, green and purple, and I used that supply to crochet lots of simple granny squares on my knee during long days as a passenger on the road. From that source alone I created enough squares to be sewn together as a lovely warm blanket, at very little cost.
One of my favourite woolly things to make with (or for) children is simple pom-poms. Who can resist their fluffy cuteness? Kids of all ages love pom-poms and are amazed when you magically whip up your own. Younger children can get involved in the choosing of colours and love to feel the yarns; older children can help with production, and little fingers are good at wrapping. The trick to a fat fluffy pom-pom is the wrapping - lots and lots of times! The cutting part of the process requires sharp scissors and firm pressure, so that's for an adult to complete.
A large pom-pom makes a fun indoor ball. Attach small pom-poms to a ribbon to be hung above a cot or pram - this type of home-made pom-pom mobile is a lovely gift for an older child to make for a new baby. Pom-poms can become pets and snuggle toys and of course they are a perfect addition to a winter beanie.
There are lots of different ways to make pom poms, but all methods require wool and scissors. When I was younger we made them using 2 cardboard rings. I've since seen them made by wrapping around 2 toilet paper rolls, and even seen tiny ones made with wool wrapped around the prongs of a fork. Years ago someone gave one of my kids a purchased plastic gadget for making pom-poms. This was a great idea, but really quite fiddly - I think you can make them just a well without, so would not recommend them.
My favourite, and the very easy-peasiest method, requires nothing extra - just your fingers, wool and scissors. I've outlined the technique below. It's brilliant because if you throw a ball of wool and scissors into your glovebox you can even make some of these easy peasy pom-poms when you are away camping or on holidays. Here's how its done, demonstrated on the (rather grubby!) fingers of my my 10 year old:

Take a strand and hold it between the tallest and ring fingers, with ends resting back toward the sleeves. This strand will later be used to tie your pom-pom at the end.
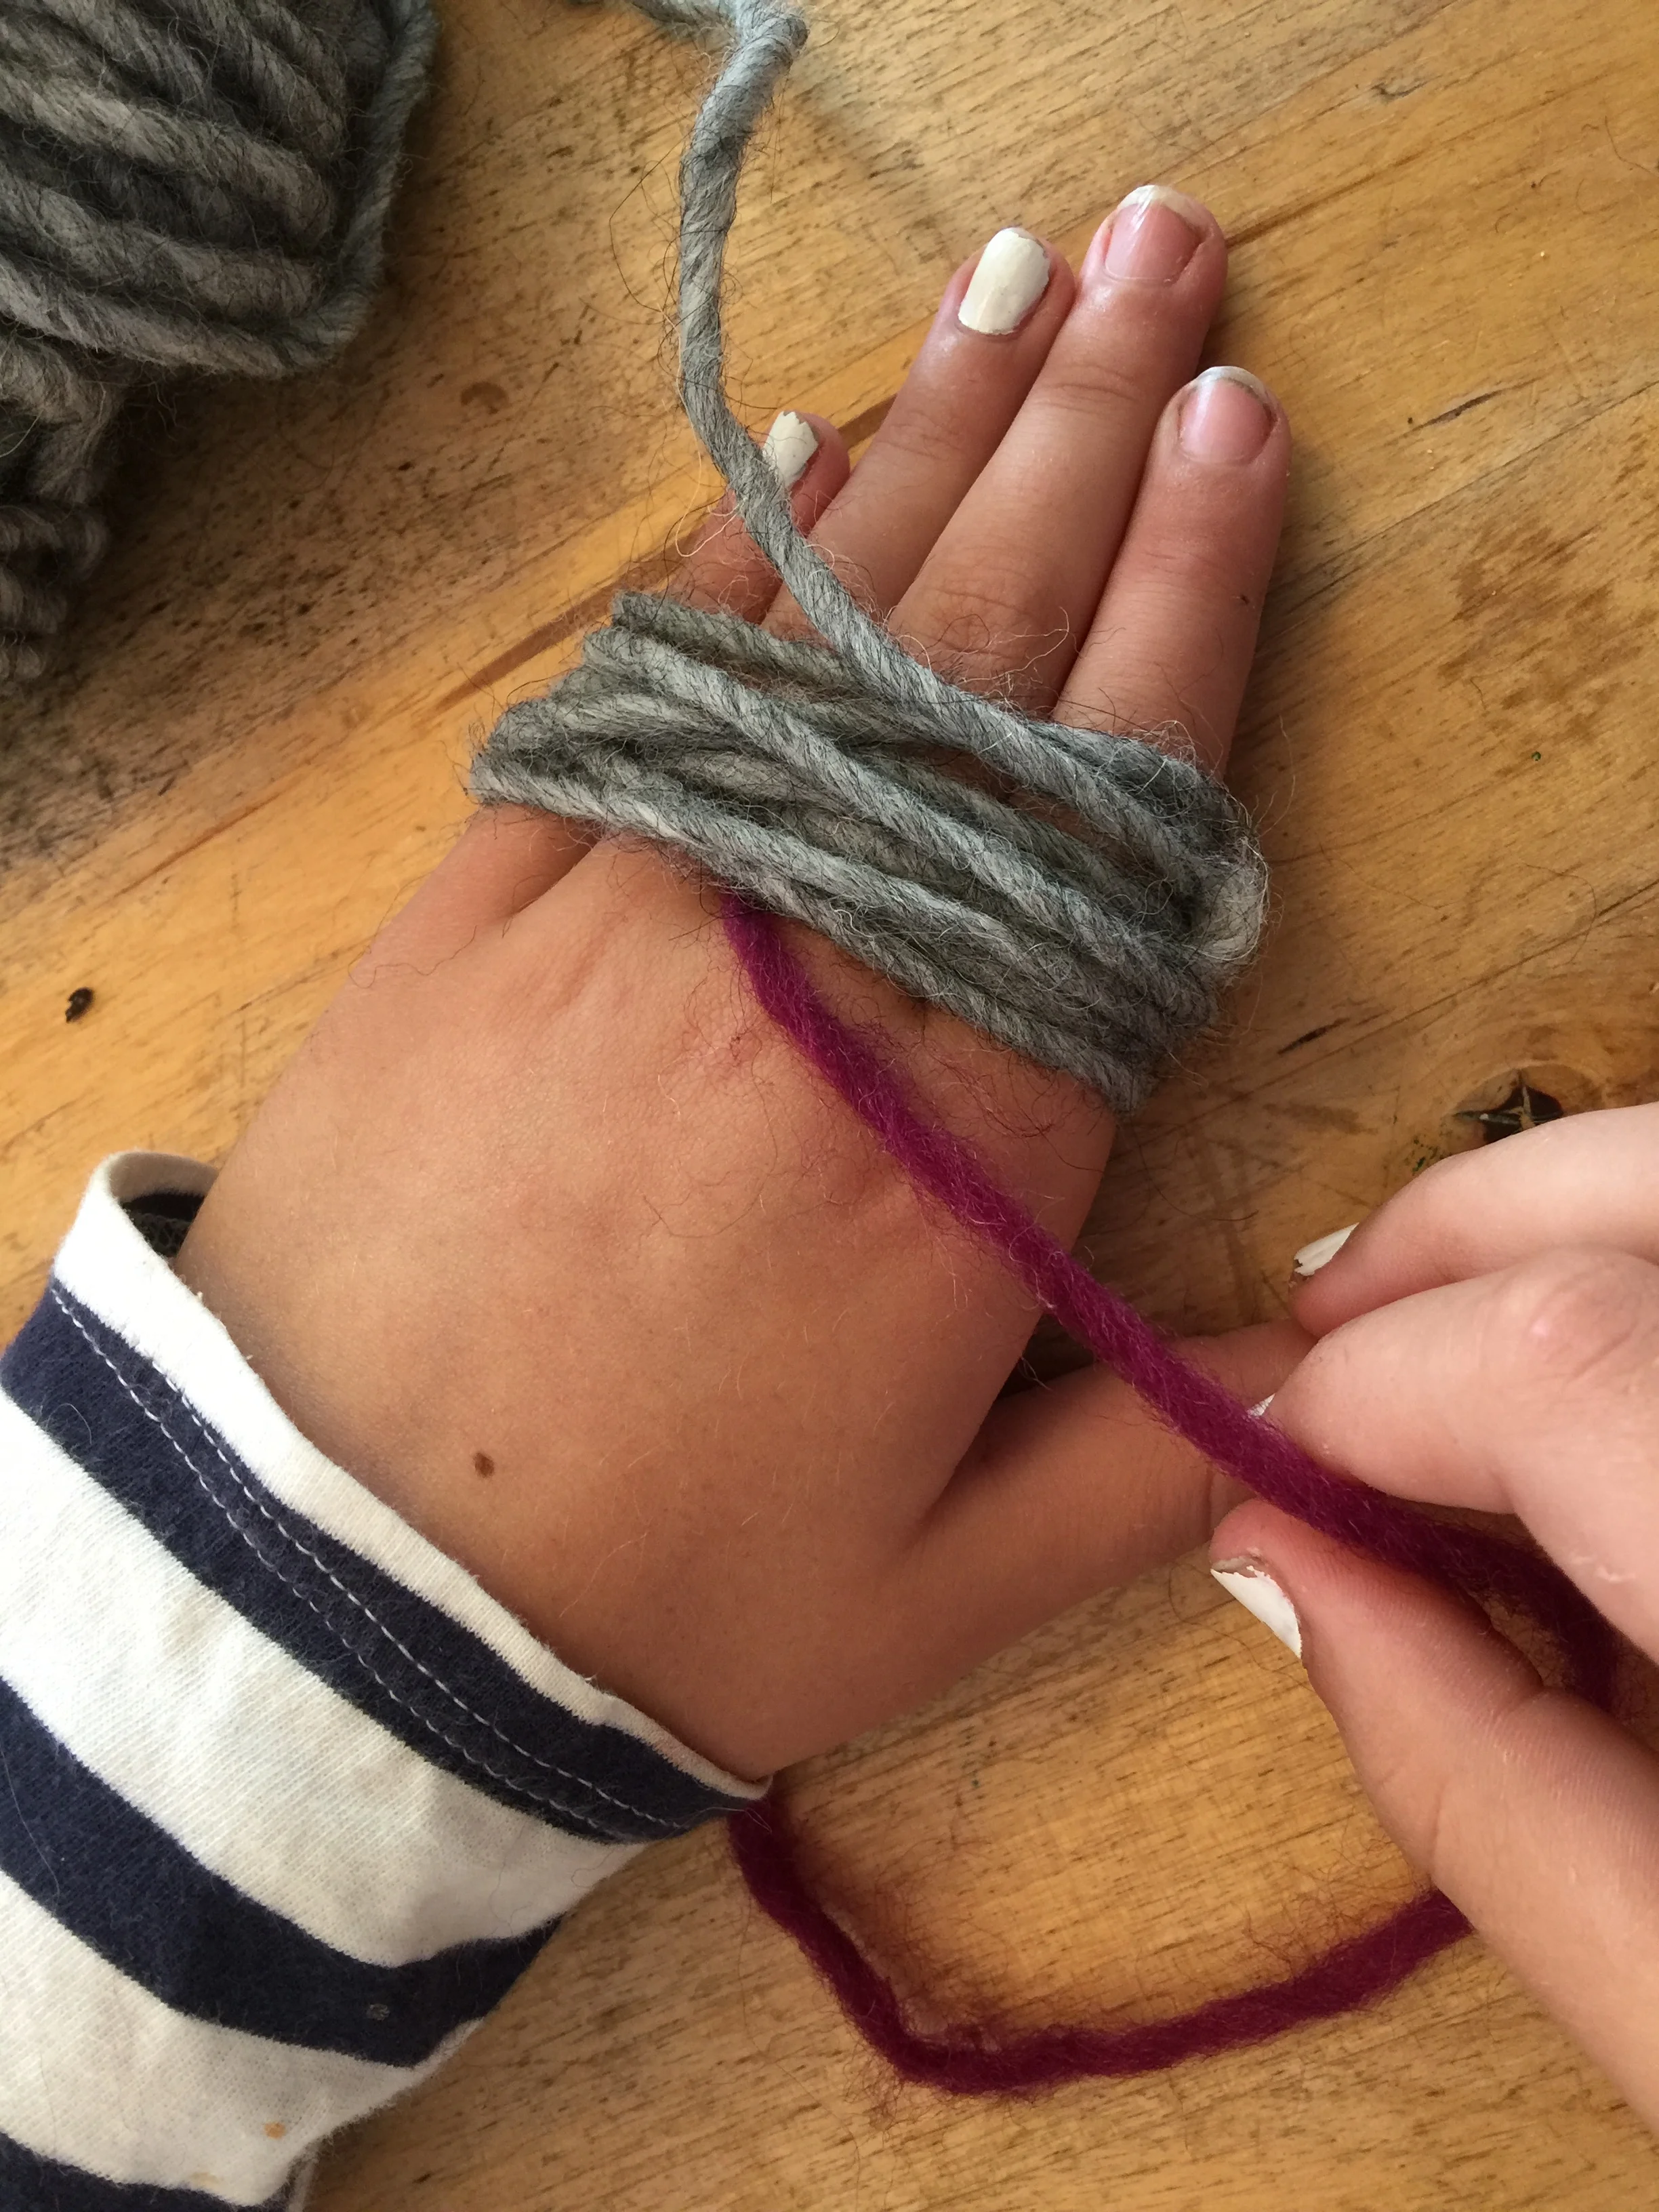
Wrap your four fingers in wool, not too tightly, but lots and lots of times... we counted to 50 rotations. The trick to a fat fluffy pom-pom is inthe wrapping - the more you wrap, the plumper they become.

Once those fingers are wrapped in a fat layer of woolly loops, bring the strands forward and use them to tie the loops together tightly, into a figure 8 shape.

Slide the tied loops off the fingers, then insert scissor blades into each loop to cut it open. This part of the process requires sharp scissors and firm pressure, so that's a job for older fingers.

Here is our pom-pom once the loops were cut, looking rather shaggy.

And here it is after a trim... adorable, round and fluffy.

